Create an Online Personality Quiz Lead Generation Tool on WordPress
During one of our many lead generation meetings for Something Blue, Julia had the idea of creating an online quiz. She follows Jenna Kutcher religiously, and noticed how popular her Secret Sauce quiz was. So why not create something similar for ourselves, only focused on our industry? After doing a little bit of digging into what she uses, I remarked that it was an embedded iframe from a third-party site, and didn’t show up the best on mobile. While Julia wanted to just use whatever Jenna uses, I thought that we could definitely recreate the same kind of quiz functionality on our own using the tools we had already bought, and didn’t need to pay for a whole separate service just for quizzes. Economically, it didn’t make sense since we were just starting out and weren’t sure of how popular the quiz would be. Technologically it didn’t make sense either – I’m a big fan of condensing the tools you use wherever possible, and choosing platforms based on their flexibility, functionality, and integrations. It’s why I’d never recommend using a tool like Leadpages or even worse, Unbounce, to any of my clients. These tools were created to “make things easier”, when in reality the same functionality can be recreated on your own site in not that much time. And if it can’t be created on your own site – that might be a sign you’re not using the right platform for your business!
In this tutorial/thought process, I’ll be using the following tools:
- WordPress (self-hosted)
- Ninja Forms (including Multi-Part Forms, Webhooks, Convertkit, Conditional Logic, and Layouts/Styles add-ons. Basically, you’ll need the Professional bundle)
- Convertkit
- Slack
Step 1: Figuring Out the Mechanics
Logistically, I know how personality quizzes work. It’s essentially a form that you choose your answer, and based on which answers you pick, you get a different result. Figuring out exactly how to translate this into an online tool with functions and a bit of math proved to be a bit more mentally intensive than I would have thought. What got me caught up for a little while was how exactly to turn someone’s answers into an end result.
So I took a trip down memory lane and researched how people scored personality quizzes back in the olden days… I’m talking teen magazines. From my own (albeit limited) experience with teen magazine personality quizzes, you would usually choose between 3 options for each question, then each response would be given an associated numerical value, which you would then total up. Depending on how many points you scored, you would fall into one of three or four categories, usually labelled with something like “if you scored between 5-10, …” The other style was “if you scored mostly As, …”, however this could also be broken down into a total score as well.
Thankfully with the introduction of form builders and calculations, we won’t need to keep the answers in the same order every time. It gives the quiz a bit more unpredictability for the quiz-taker, which helps to get accurate results.
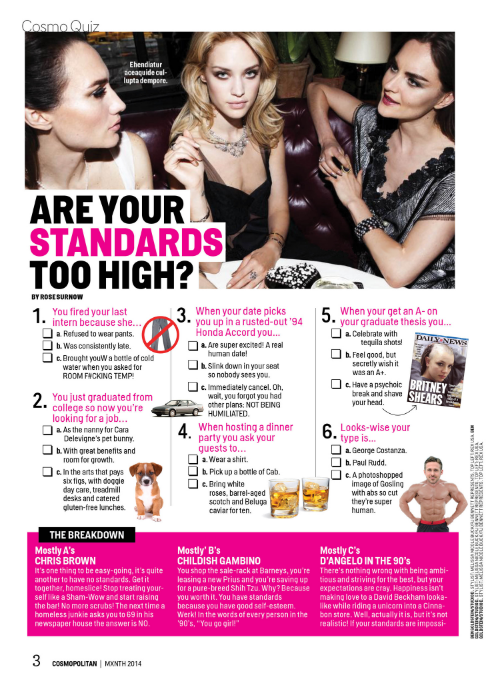
I took inspiration from popular teen magazines for how their quizzes were scored. Some had a “for every A, 1 point, for every B, 2 points, for every C, 3 points” system after you circled your answers. Others, like the example here, went for a “if you scored mostly As, etc.” approach.
Step 2: Writing the Quiz Questions
Looking back on the whole process, actually writing out the questions was the hardest part by far. I think I’m a fairly good writer, but it was challenging coming up with questions that alluded to the answers we wanted to get, but didn’t say them outright. In this example, we wanted to see how experienced our target market was with marketing by comparing it to a relationship status. The worst part about any personality quiz is when the answers point you in a very obvious direction. Sort of like every amateur “Which Hogwarts House are you?” quiz ever, where the questions basically boiled down to “Are you courageous? Are you smart? Are you evil? Are you kind?” and let the quiz taker manipulate their answer into whatever house they wanted to be in.
To combat this, we first came up with the concepts for each of the questions, such as “what/how many social media platforms do you use?” and “how often do you analyze your marketing?”, then came up with the answers for a beginner, intermediate, and advanced level as if it was a survey rather than a personality quiz. After that, we brainstormed what scenarios we could use that had similar levels of choice, so “what/how many social media platforms do you use?” turned into “how do you choose a restaurant for date night?”.
Once we had our 5 questions and their answers for each level, it was time to put it into Ninja Forms!
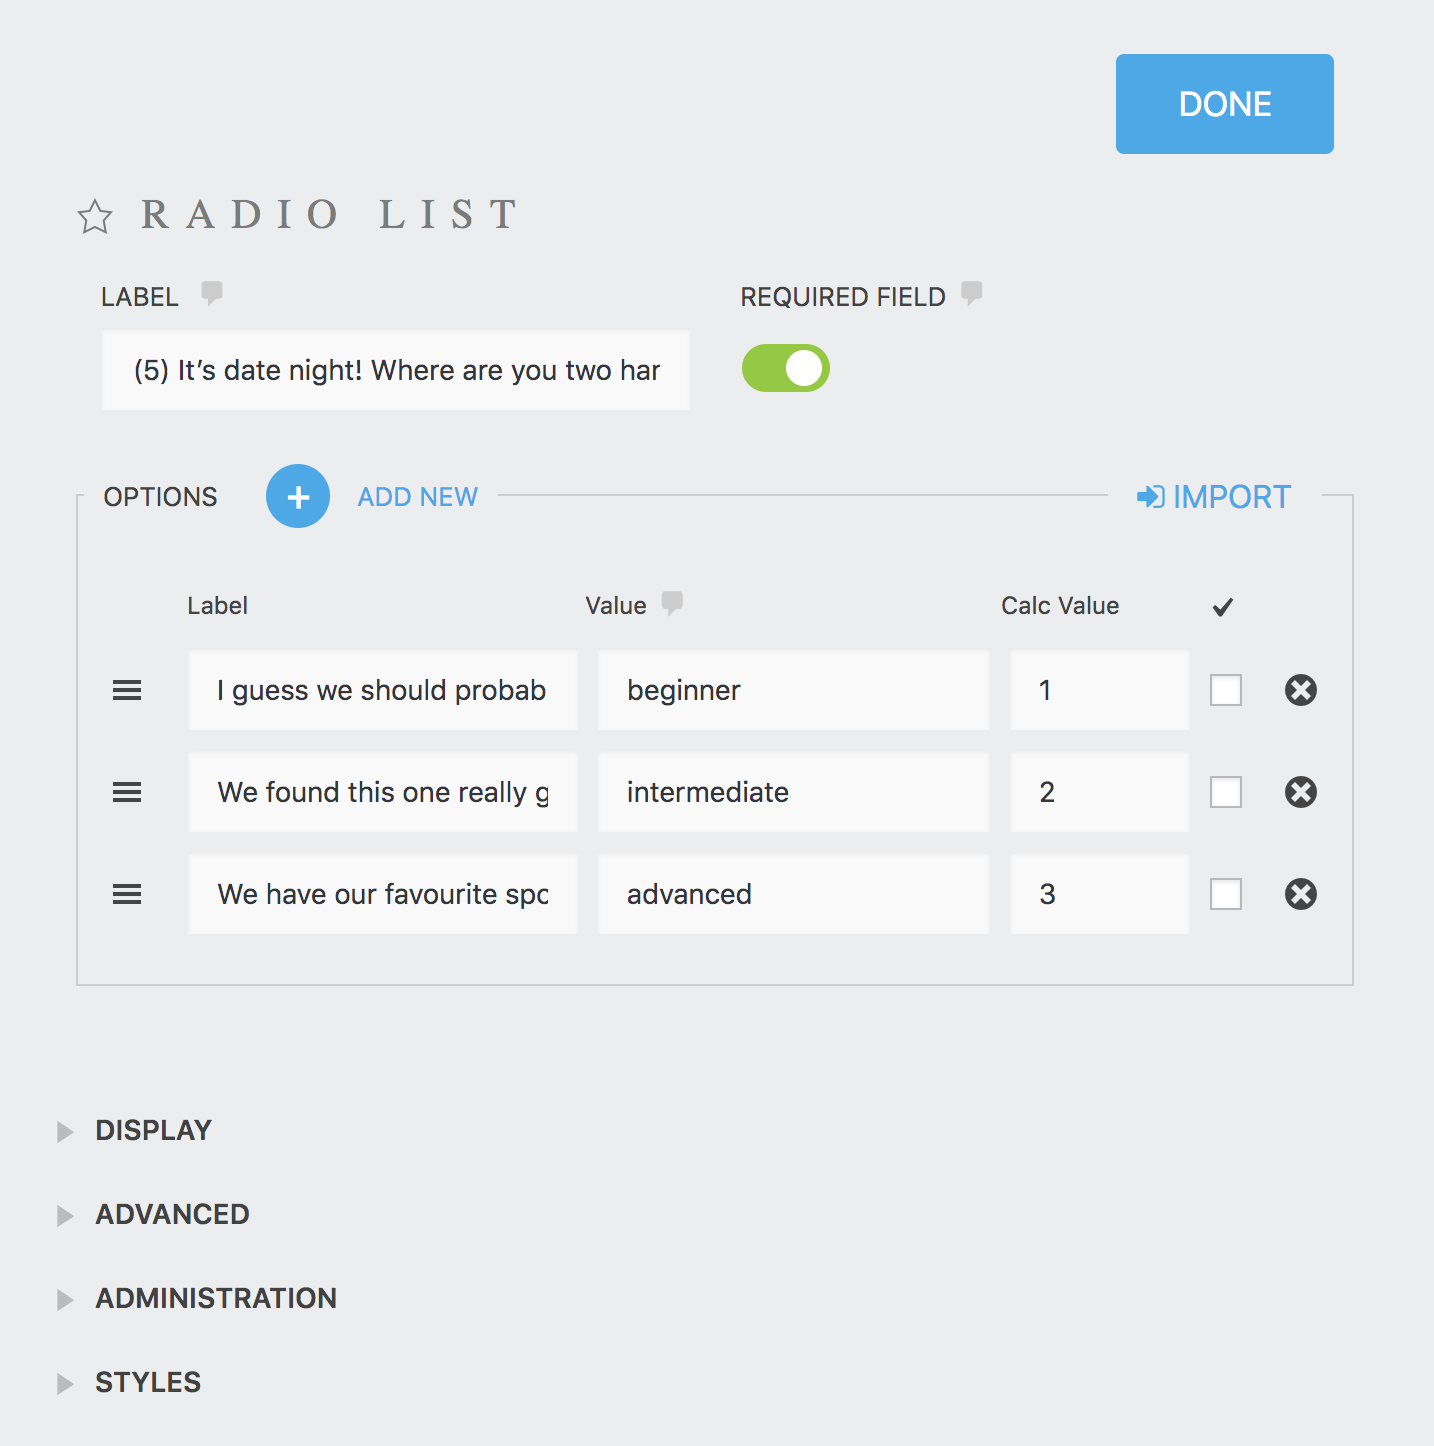
Click the image to see a bigger example of how each question was laid out in Ninja Forms in it’s own multi-page section. I also went into Admin to change the field name of each question to “q1” etc to make the calculation easier for later. Each possible response was first added in in order of beginner, intermediate, advanced, then rearranged after the questions were all inputted.
Step 3: Creating the Quiz in Ninja Forms
Can I just take a moment here to say how much I love Ninja Forms? Totally not sponsored, but the functionality, flexibility, and integrations are virtually unmatched compared to any other form builder I’ve used. I’ve thrown some pretty crazy stuff at it for clients over the past little while and I’ve been able to do everything with ease.
ANYWAY, I started by creating a new form in Ninja Forms and creating 7 sections: one for every question, one for the introduction, and one for the lead gen conclusion-y section, but in order of course.
Each question was formatted as a radio list with 3 possible answers. I gave each the value of “beginner”, “intermediate”, and “advanced”, and a calculation value of 1, 2, and 3 respectively. I made sure to label everything correctly in case someone needed to change something in the future – always create things with lots of notes so they don’t need to be recreated if you’re not on the project anymore. Even just for myself, I develop on so many different sites with slightly different syntaxes that I need the notes to remember what the heck I was doing – and I built the things to begin with!
The questions were also marked as required so that you couldn’t submit the form without an answer, and I renamed each of the fields in the Administration dropdown to be “q1” etc. to make the calculation easier later. Ninja Forms automatically creates a randomly generated bunch of numbers appended to the type of field, but when you’re using conditional formatting, calculations, and other add-ons, I really recommend taking the time as you’re building your form to rename each of these to something easier to remember. Especially if you’re using integrations to other tools like Convertkit, Webhooks, or Slack, having the same field naming structure across all fields will save you some blonde moments when you wonder why your form isn’t pushing the email address correctly into Slack. Spoiler alert: it’s because you called it “email-address” in this form, but “email” in literally every other form.
Step 4: Creating the Calculation and Success Messages
Once the questions were all good to go, next up was creating the calculation and success messages, then setting up the conditional formatting for each.
The calculation was pretty simple: just add all of the question responses together. I’ve added a screenshot here for you just in case. I added the calculation as a hidden field on the lead generation page just so it would come through properly in the submissions in case something broke, and also added another hidden field called “segment result”, which would be used for the groups later.
Next was to create each of the success messages based on what the quiz taker’s response was. Since we had 5 questions and gave possible values to each response from 1-3, the quiz taker could end up with anywhere from 5-15 points. We separated the possible outcomes into the 3 groups for beginner (5-7 points), intermediate (8-12 points), and advanced (13-15 points). Each group had it’s own success message, which was set up in the Emails & Actions tab.
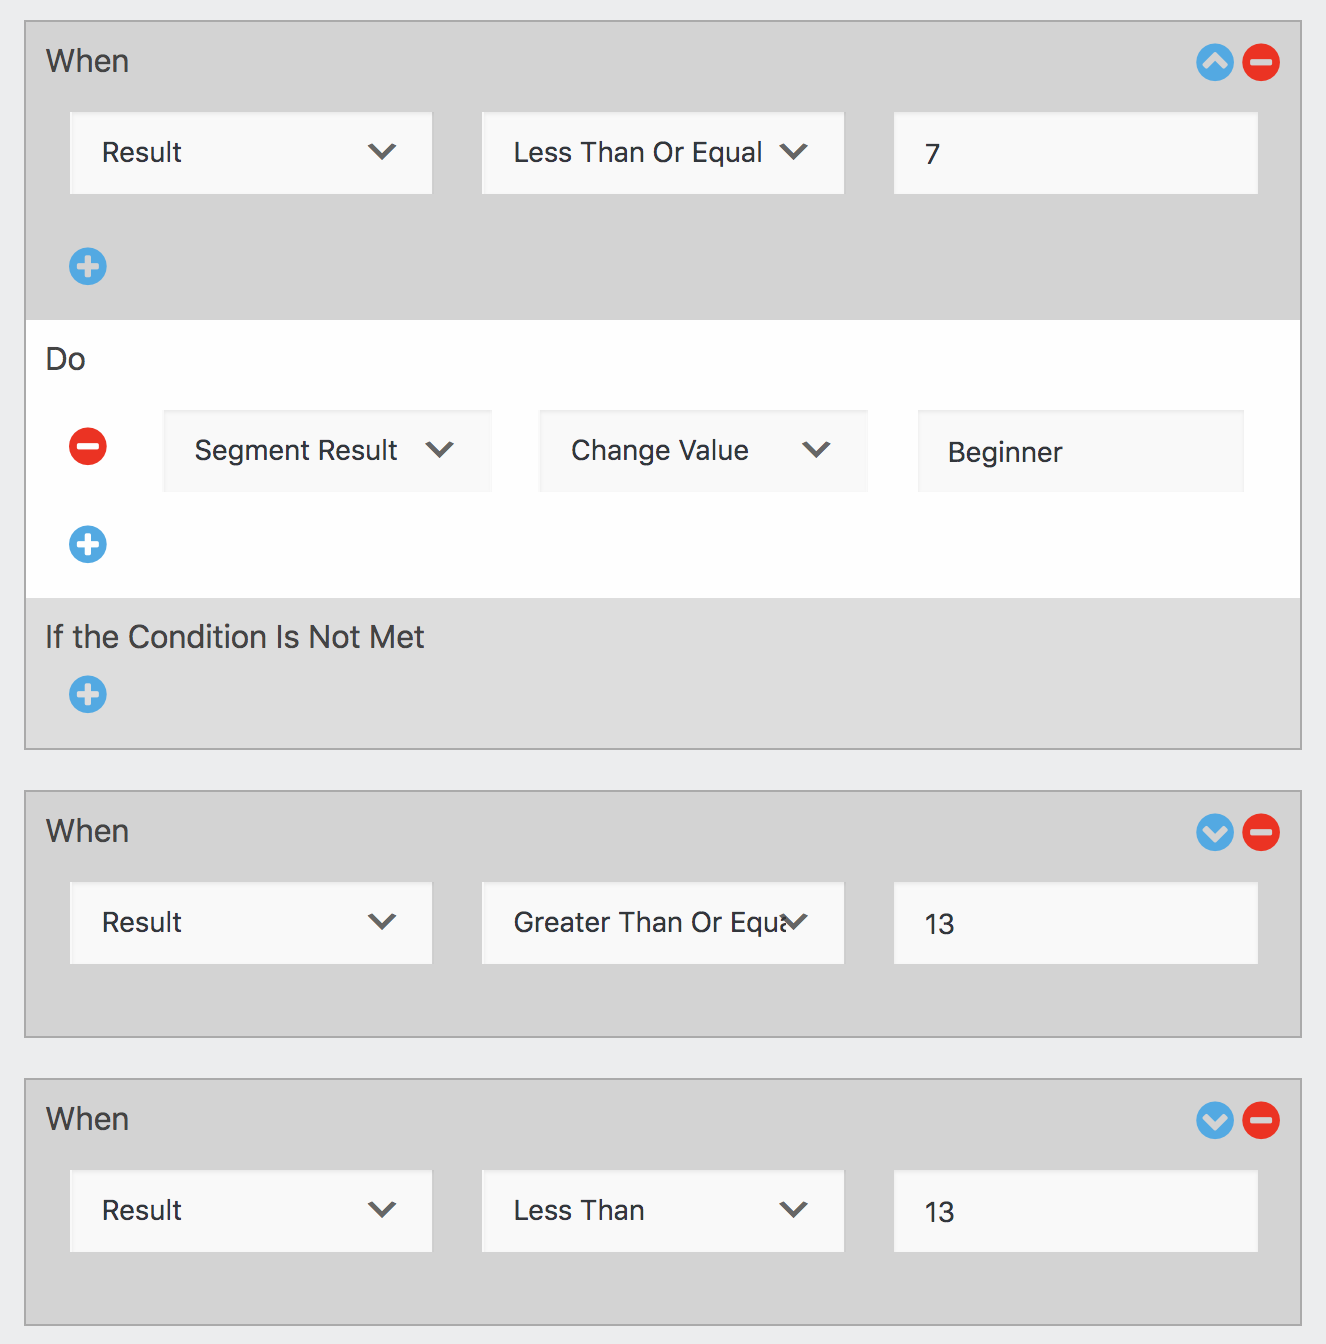
After the success messages were created, I went into the Conditional Formatting options and created conditions for each of the groups as shown in the screenshot. If the final calculation score was less than 7, change the “segment result” field to the value “Beginner”, and so on for the other two groups.
Once this result field was configured, I went back into the success messages and set each one to conditionally show based on what the value of the segment result field was. If it was “Beginner”, show the outcome for “Beginner”, etc.
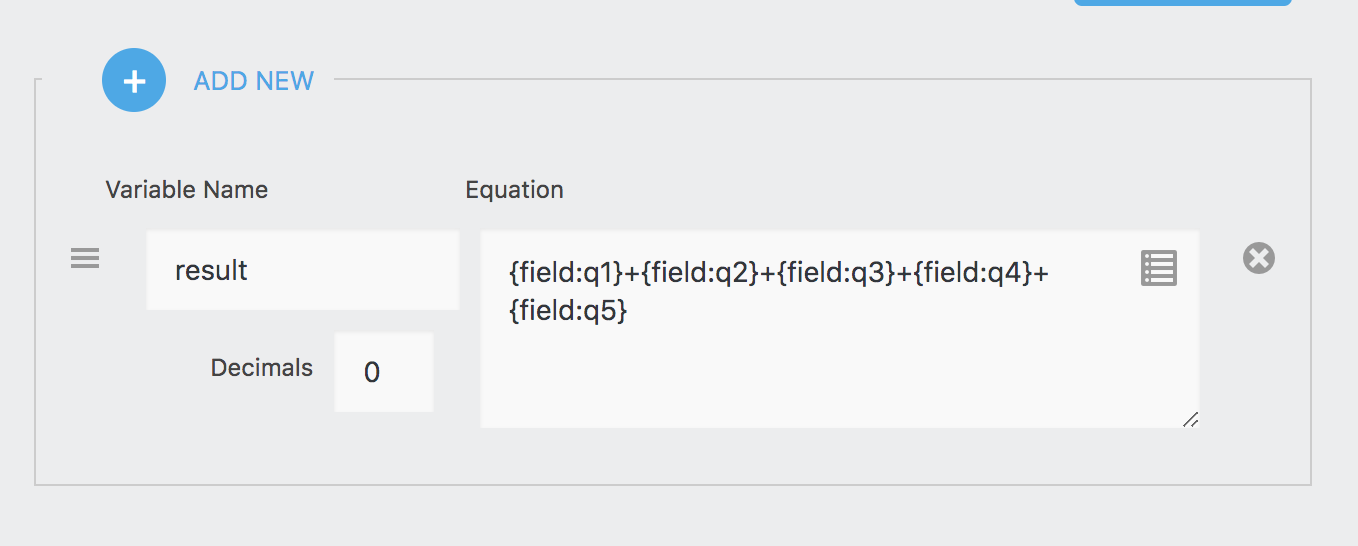
Click the image to make it bigger! Having short field names for each of the questions means that this calculation is super easy to read. Using the menu option on the upper right corner of the equation box, select each of the fields you want to calculate together instead of typing them in yourself. It helps to ensure there aren’t any syntax errors.
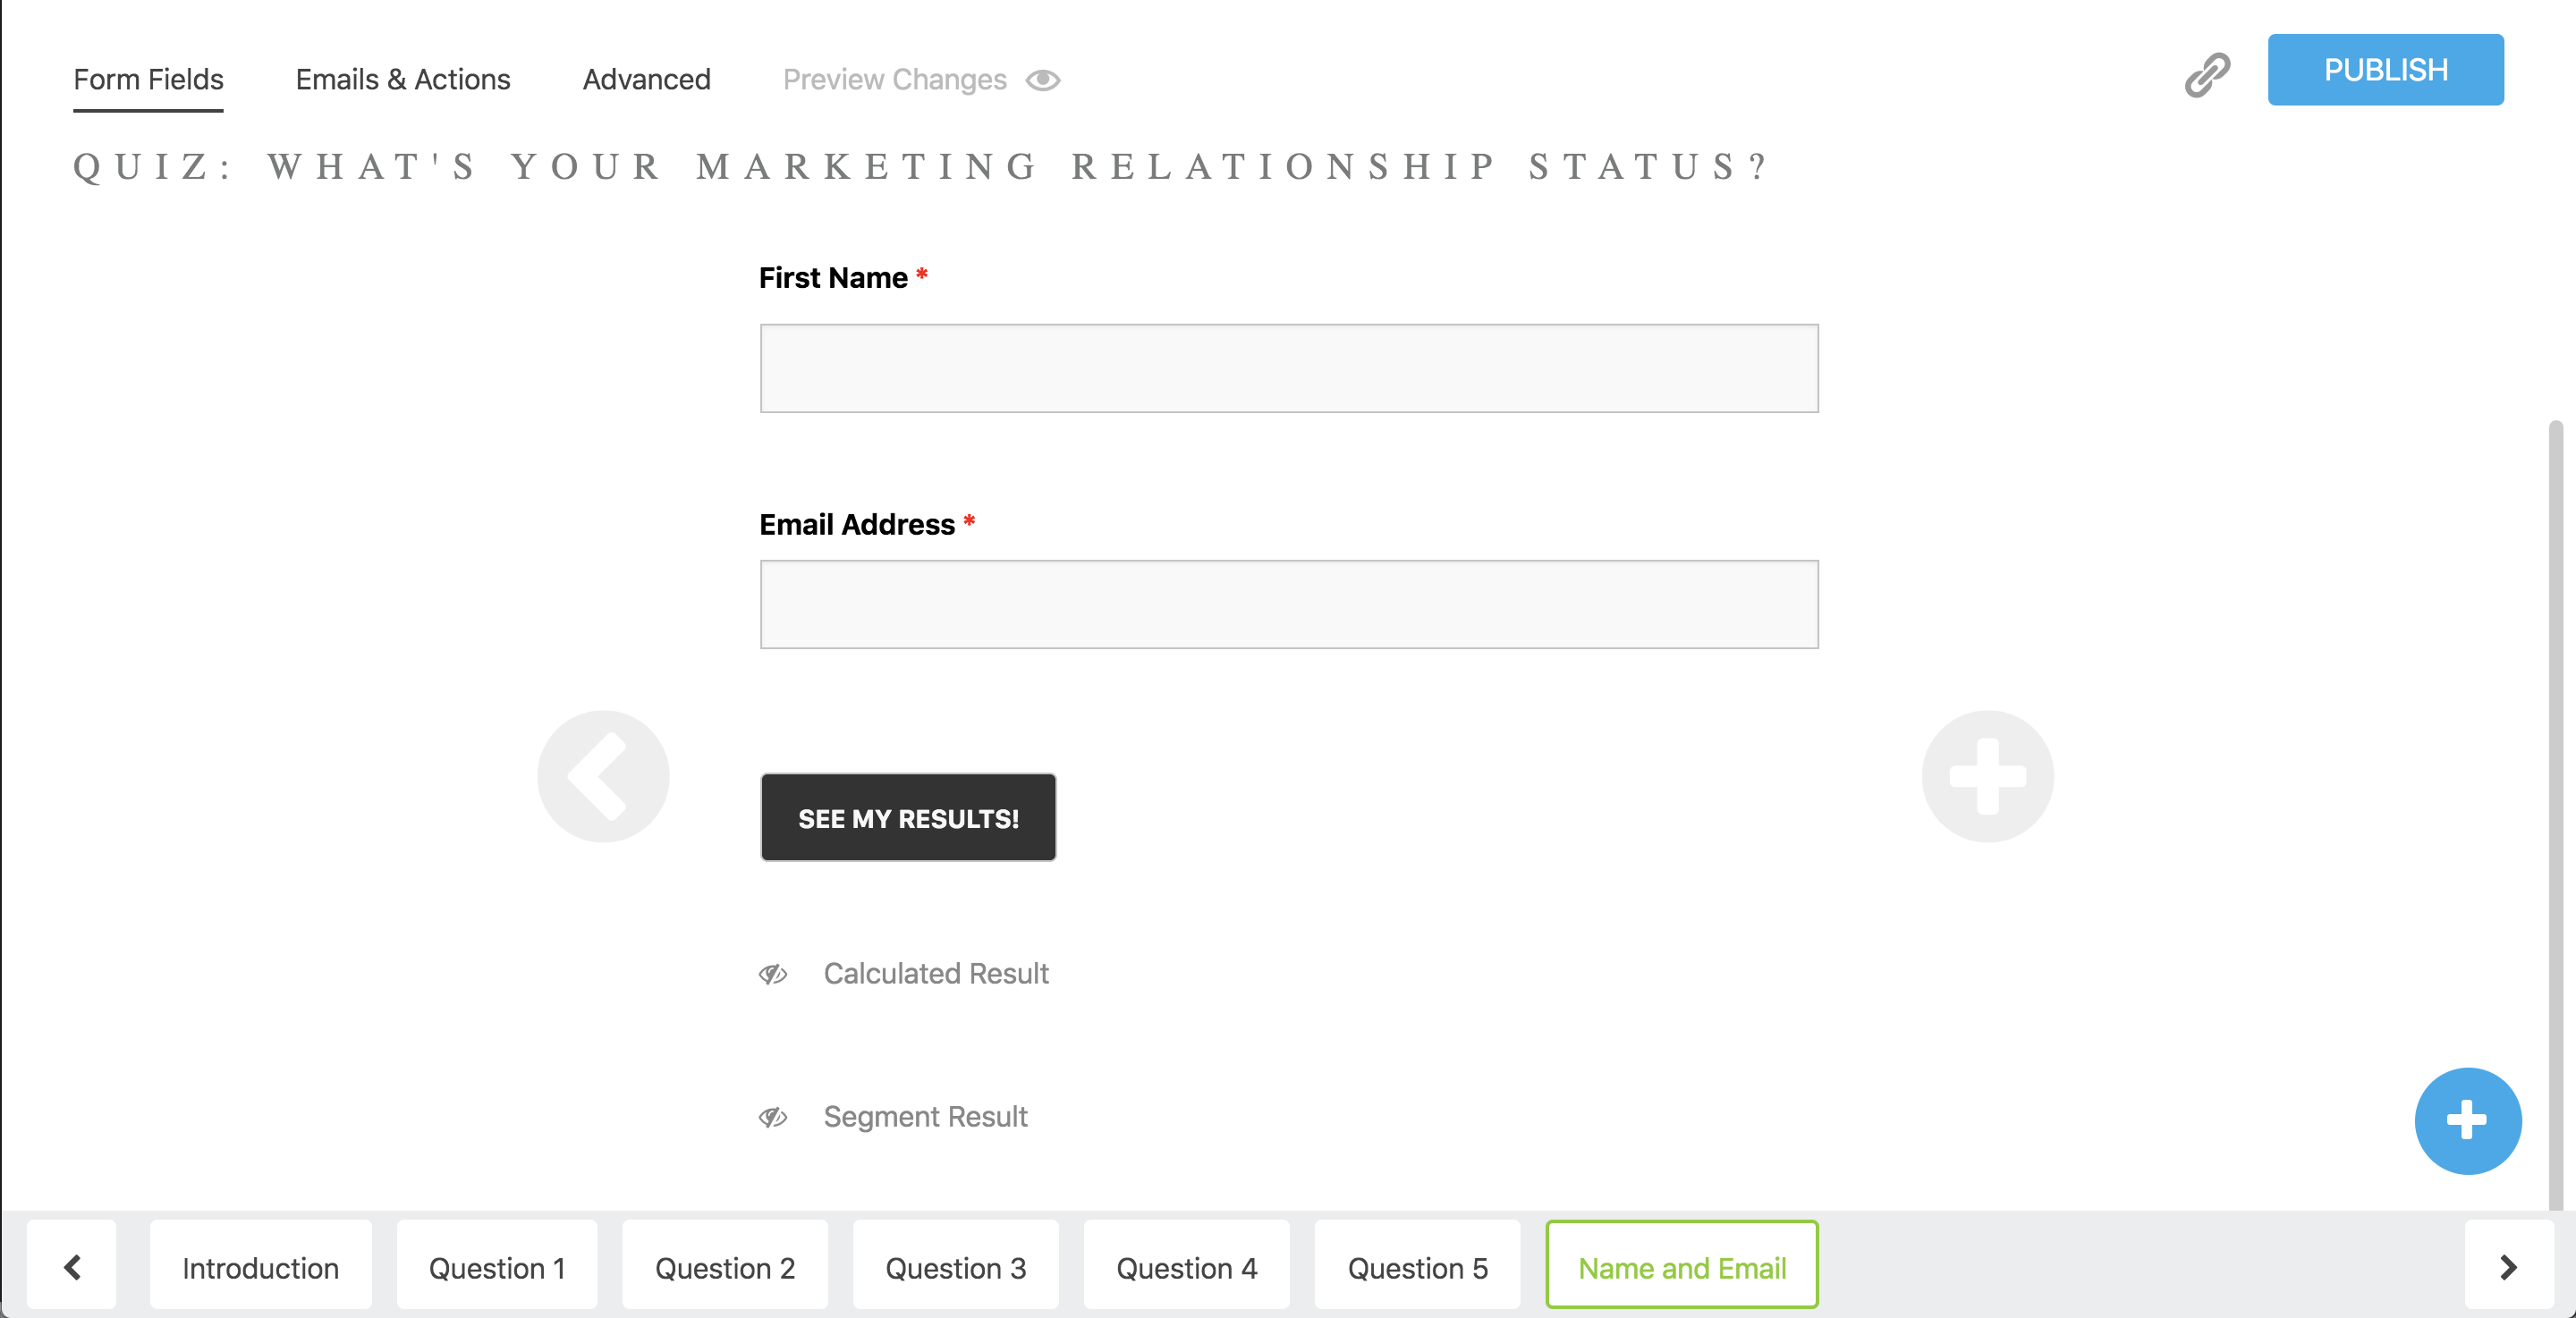
Click the image to make it bigger! Your last page not only holds the name/email requirements for people to see their results, but also 2 hidden fields to capture the final score and segment of your quiz taker. This information will make it easy to add integrations later!
Click the image to make it bigger! Create a hidden field first, then add conditional formatting that changes the value of your “segment result” hidden field to what you want the outcome to be. Here’s what the conditional formatting looked for me.
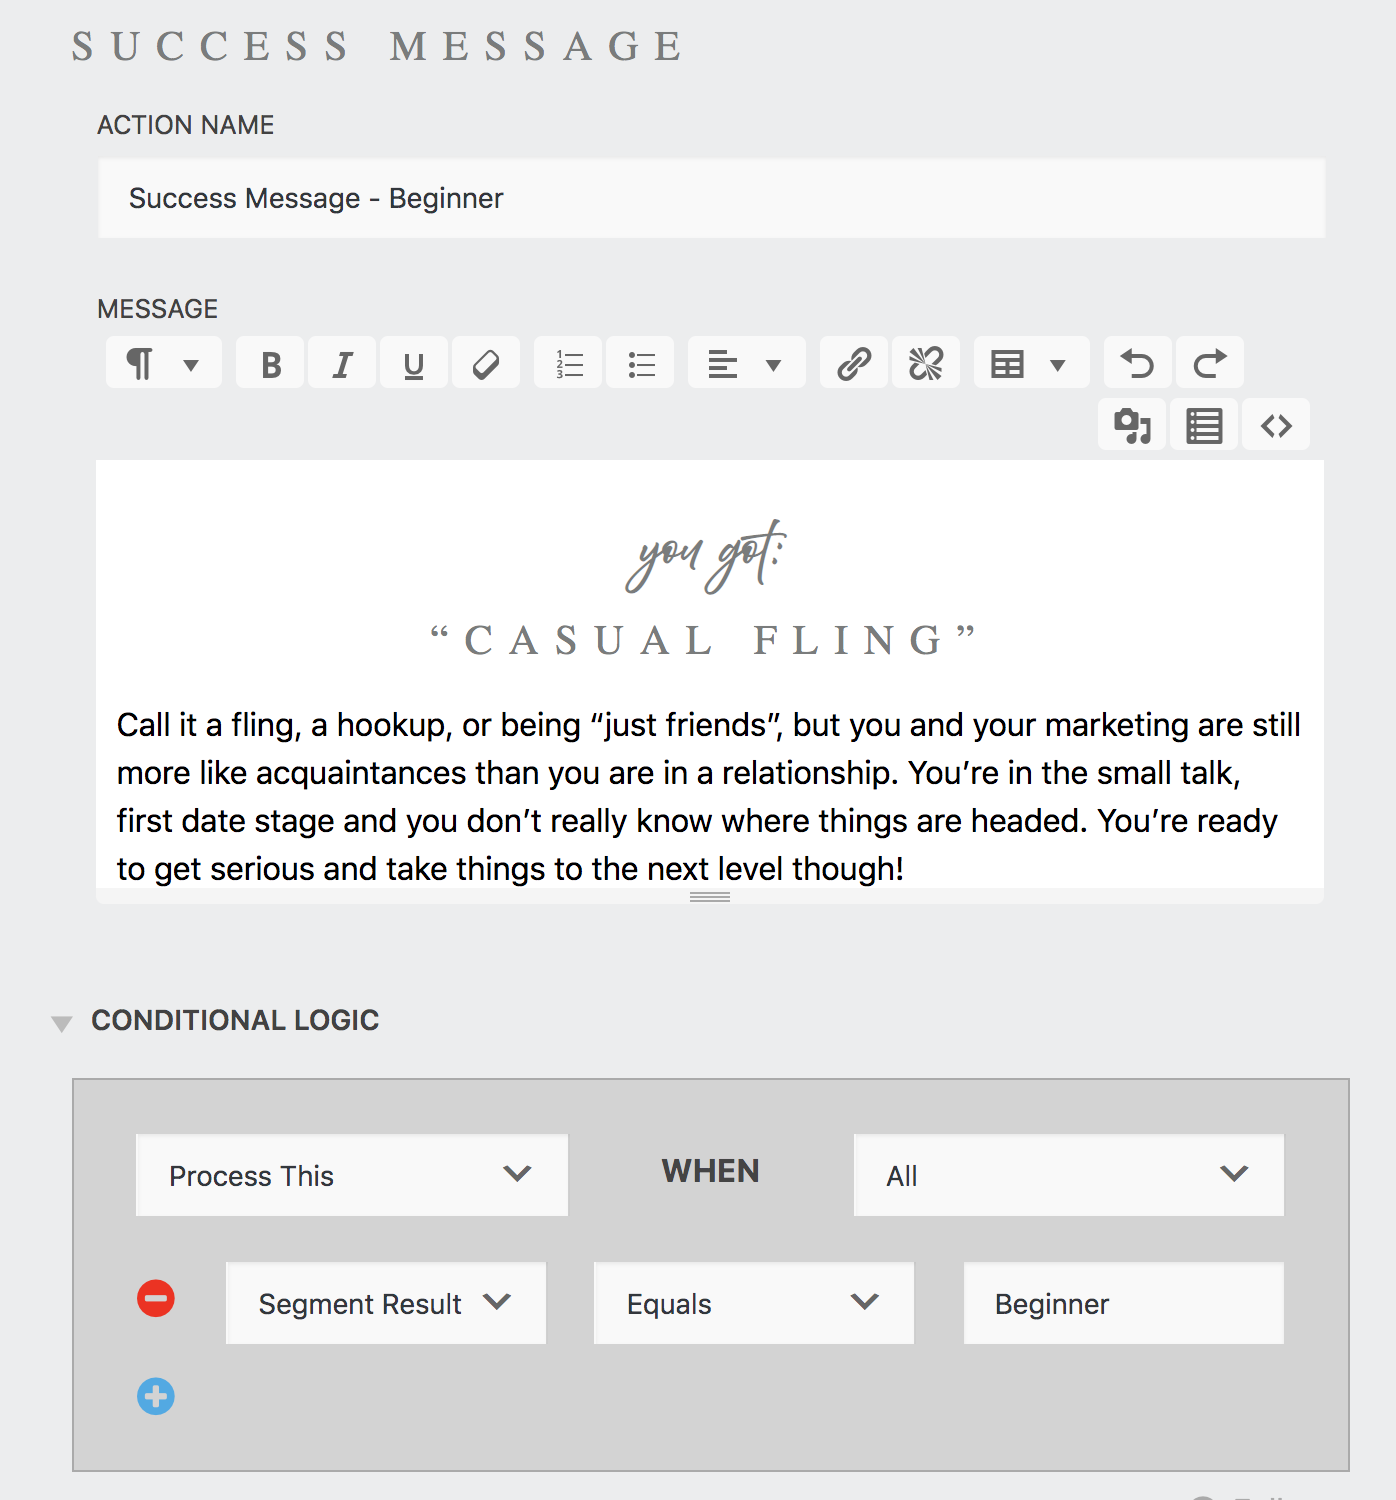
Click the image to make it bigger! Creating a success message for each outcome makes your quiz look all the more professional, and ensure you aren’t giving away any secrets before people give you their contact information. Don’t forget to click the <> icon to insert HTML formatting – the text you insert here will get placed where your form is, and some headings can really help make it obvious what your quiz taker is looking at after they finish your quiz!
Step 5: Connecting to Convertkit
Once the form itself is built comes time to connect it into the rest of your marketing. For us, that meant adding people to segments and tags in Convertkit. We don’t actually use the “forms” feature since everything on our site is with Ninja Forms, but the Ninja Forms Convertkit add-on lets you add people to unlimited forms, sequences, tags, and segments (which is exactly what you want in an integration). For this example, we added people to the sequence for each segment result in Convertkit, and also tagged them with their result as well. The email sequence had a quick “hey here’s your result” email, and included an opt-in button for people who were not already on our list. This sequence and tag were duplicated for the other two outcomes.
Note: if you don’t see your updated sequences, tags, and forms available in Ninja Forms, don’t worry! Just go into your settings and refresh your API connection, there should be an easy button to press that does this for you. This is why we set everything up in Convertkit first and then connect it to Ninja Forms after.
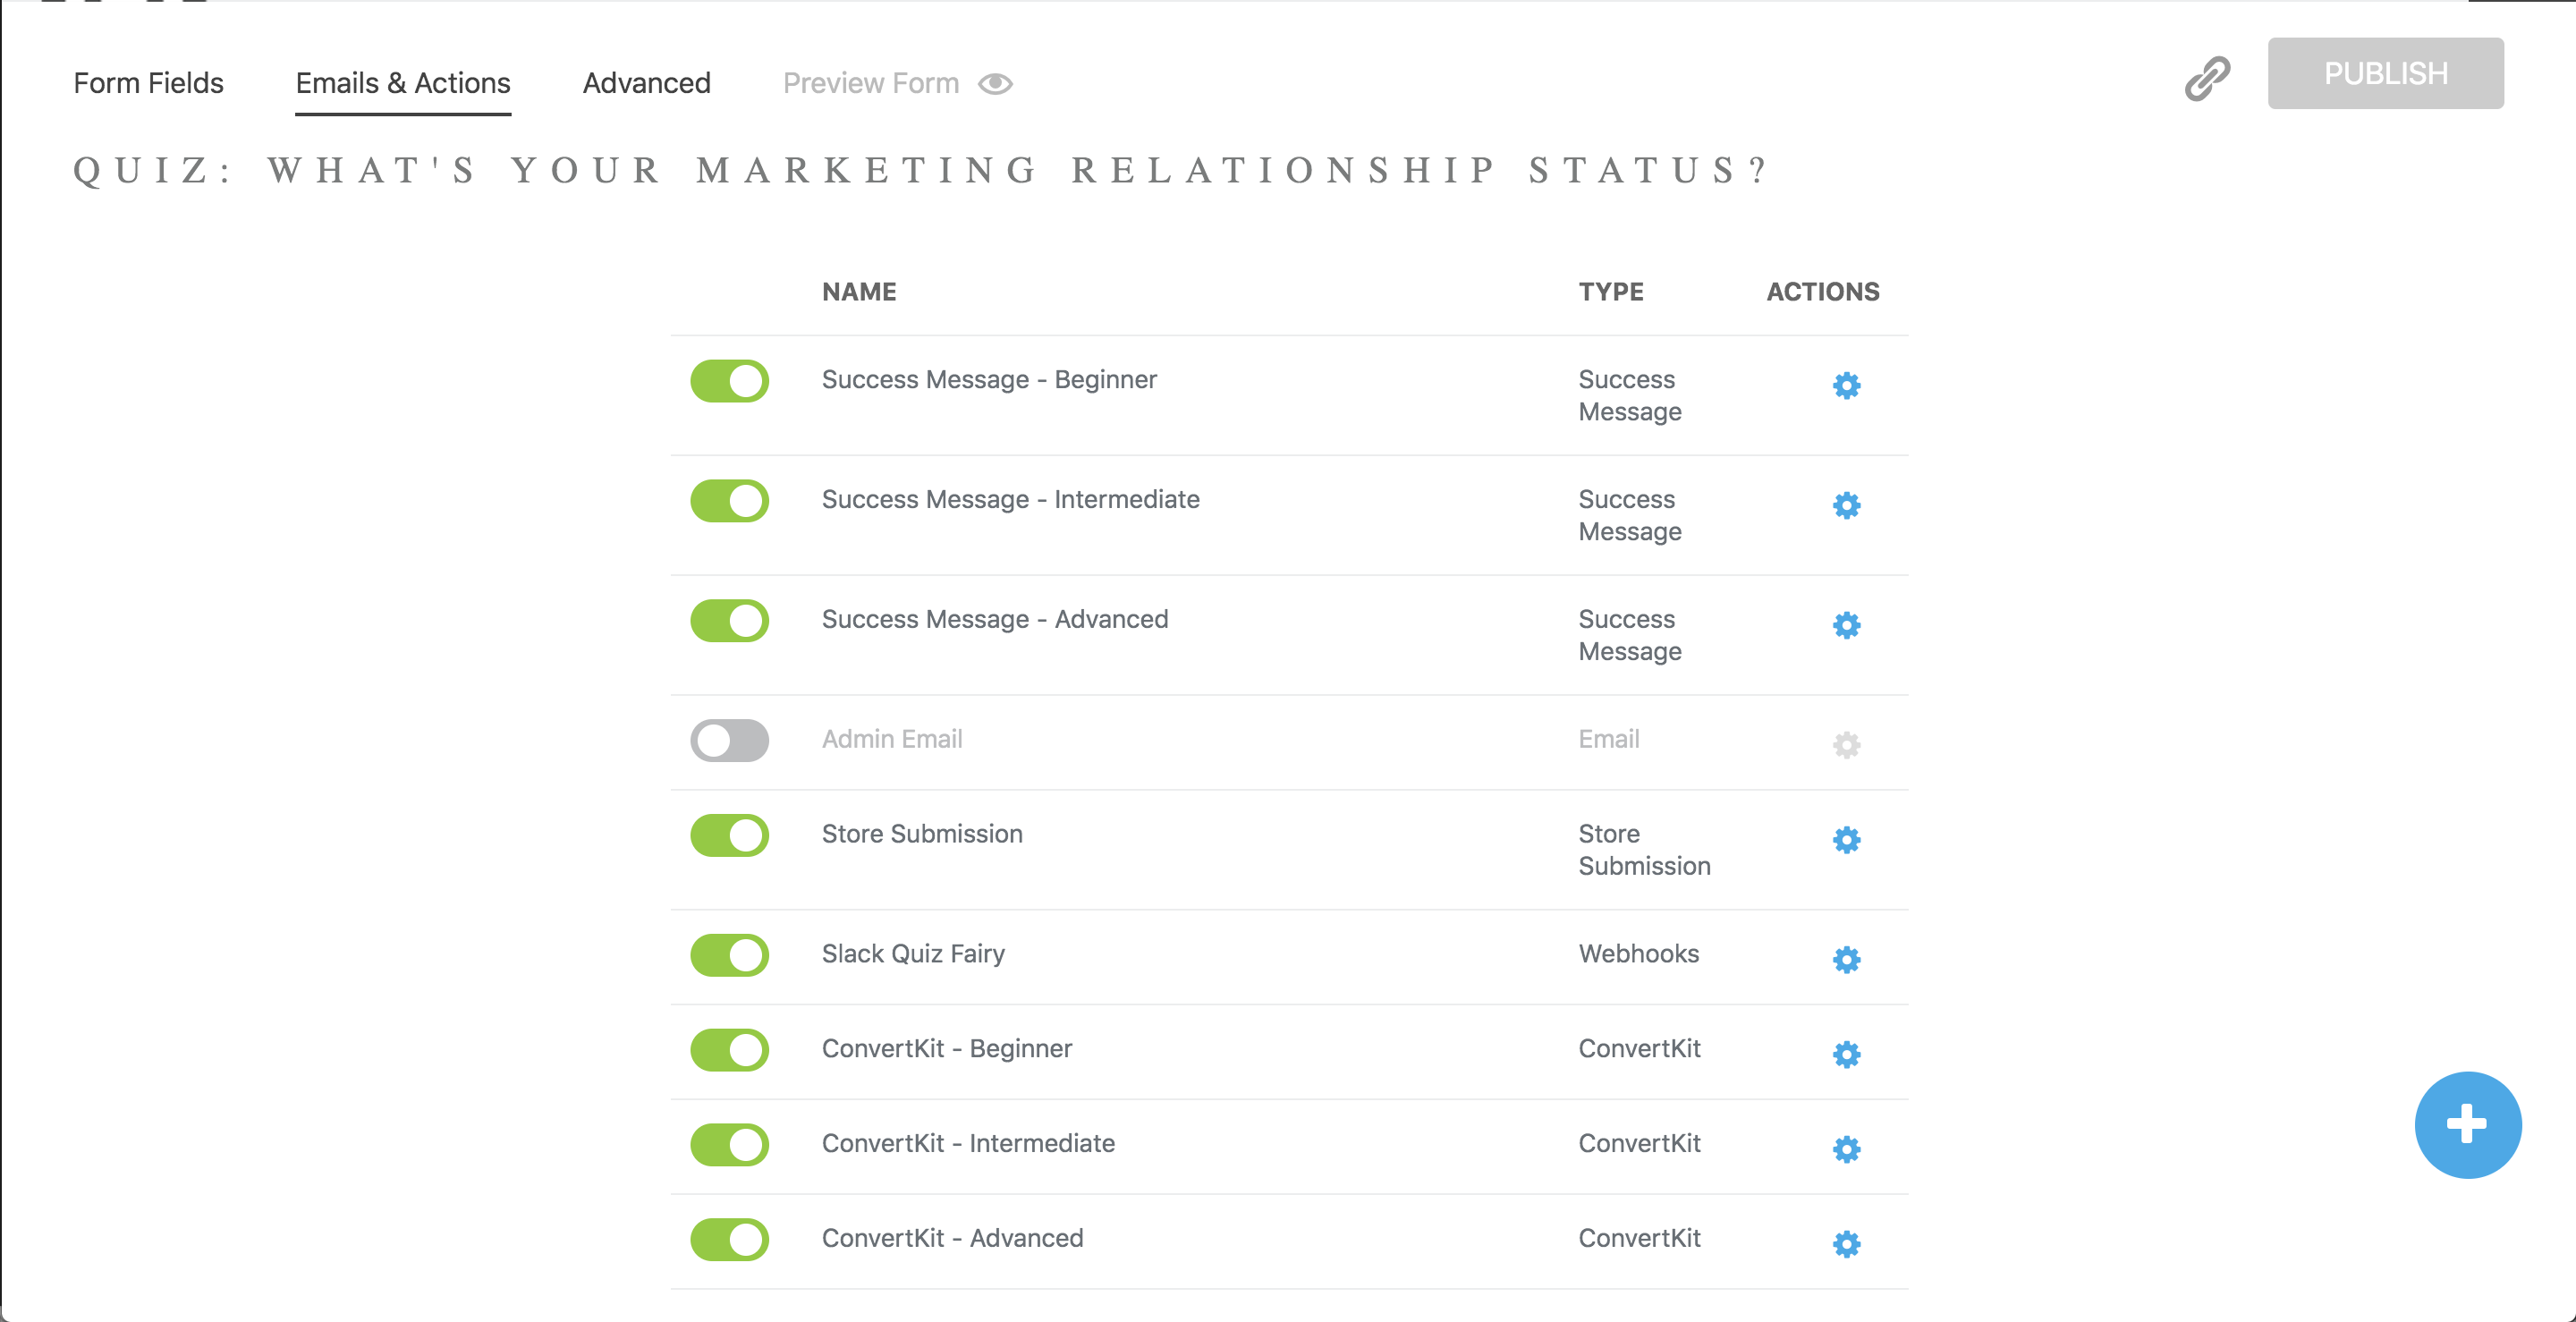
Click the image to make it bigger! Here’s how many emails and actions this one quiz has. One success message and Convertkit connection conditionally formatted for the result, one Slack connection to notify our team, and a Store Submission to make sure we can troubleshoot if something isn’t working right. Since we have the Slack connection, I’ve disabled the Admin Email to keep our inbox client-focused.
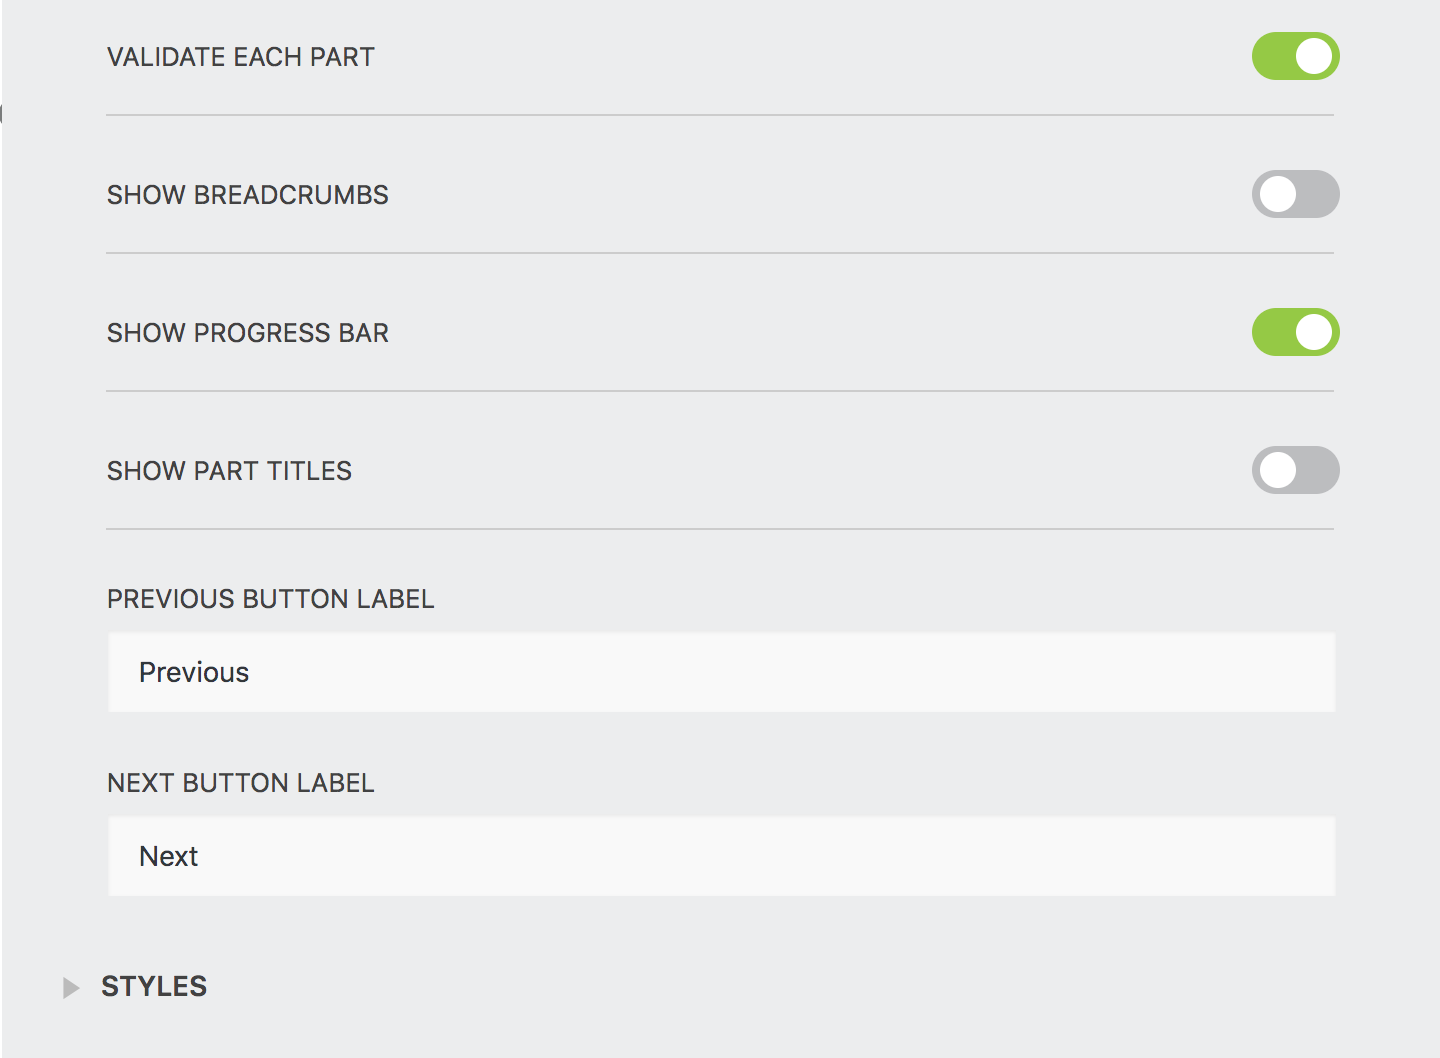
Click the image to make it bigger! Don’t forget to think about your quiz taker and what size of screen they’ll be on. Space is a luxury on mobile phones, so removing any options that don’t directly help your quiz taker will keep them focused on your main goal: getting them to fill out the quiz!
Step 6: Formatting the Multi-Part Functionality
One thing that Julia loved about the Jenna Kutcher quiz was that it was simple, and only showed one question at a time, starting with a splash screen. To mimic this, I added an “Introduction” section of the form that housed the title and description of the form. Then, each of the questions, and finally the lead generation “give us your email” section before the quiz was done. In the Multi-Part options, I enabled “validate each part” so that you couldn’t go onto the next question without filling the current one out, and “show progress bar” so people would know how much farther in the quiz they had. I disabled “show breadcrumbs” and “show part titles” to keep the look of the form minimalistic, and so people wouldn’t see the more admin-y titles I gave each of the sections. From a user experience perspective, having less information is sometimes better than having more because it allows them to focus on the most important part of the page. In this case, we wanted the quiz to be used as a lead generation tool, so keeping people focused on the quiz questions was our top priority.
Step 7: Setting Up Notifications in Slack
Ok so technically this one step could be a whole other tutorial (which I do plan on making eventually), but here are the basics.
We use Slack for 99% of our communications, so it only made sense to start getting form notifications in Slack as well. I set up a new bot for Quiz Takers (called the “Quiz Taker Fairy” – all of our bots are fairies), gave it a profile image and name, and added an incoming webhook – this is the part that connects it to your form. You’ll get a generated URL that you pass your data through to have it show up in Slack on whatever channel you want. For us, that’s an Email Notifications channel, but it could be a direct message to yourself as well.
In the Emails and Actions tab in Ninja Forms, I added a new Webhook and named it the Slack Quiz Taker Fairy so I’d be able to find it later. Then, I pasted the URL from Slack into the Remote URL field, and set the method to Post (that means it sends the info to that URL rather than grabbing it from the URL). Under Args (arguments), set the key to text, and the value to whatever you want to show up in Slack. For us, that meant an emoji, some information about the person, and finally a call out to @here to notify anyone who was online. If you’re new to Slack, make sure to use @here instead of @channel so you don’t start getting tons of notifications in the middle of the night! This Value is set up in markdown text, so read up on the formatting if you’re not familiar and want to add emojis or make things bold.
Here’s what our Value is: :sparkles: *{field:first-name}* ({field:email}) just took the *marketing relationship* quiz and got this result: *{field:segment-result}* :sparkles: <!here>
Note: you’ll want to create this Value string in a text editor or another window, since the Ninja Forms field doesn’t actually scroll. That way, you’ll also be able to use a tester to make sure your formatting shows up correctly in Slack, then add in the fields later.
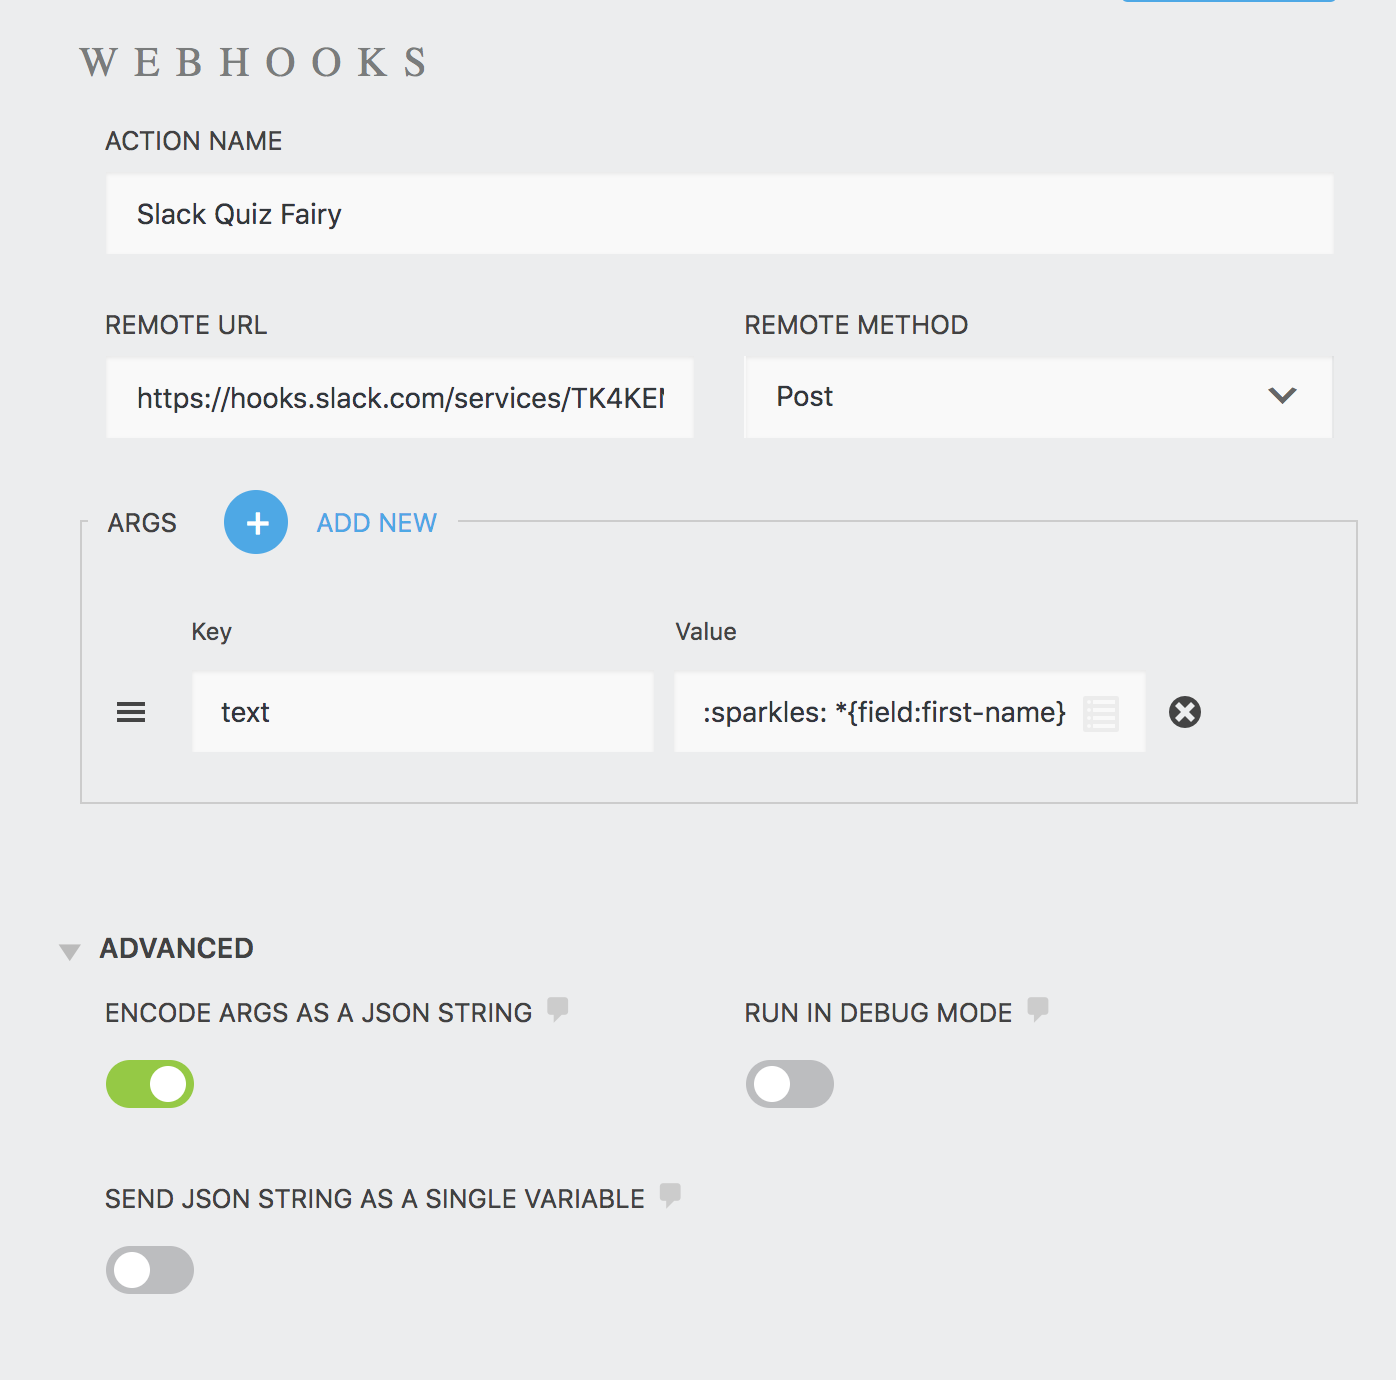
Click the image to make it bigger! Here’s what the Webhooks set up looks like in Ninja Forms. Be sure to toggle the Advanced drop down and enable “Encode Args as JSON string”, otherwise your info won’t pass through!
Click the image to make it bigger! An example of what the notification looks like in Slack. There’s just something about a cute little fairy telling me my marketing is working that makes me want to do a happy dance.
Step 8: Creating the Webpage
FINALLY once all of the backend work is done, it’s time to create the page on which your quiz will live. When designing this page, be sure to keep it simple and focused on the quiz itself, and make sure you keep mobile users in mind. If you’ll be sharing this quiz on social media (which you should!), your audience will most likely be viewing your quiz on a mobile device. Your quiz shouldn’t scroll sideways or get cut off if you can help it, nor should it have a massive section that the user needs to scroll past to actually get to your quiz.
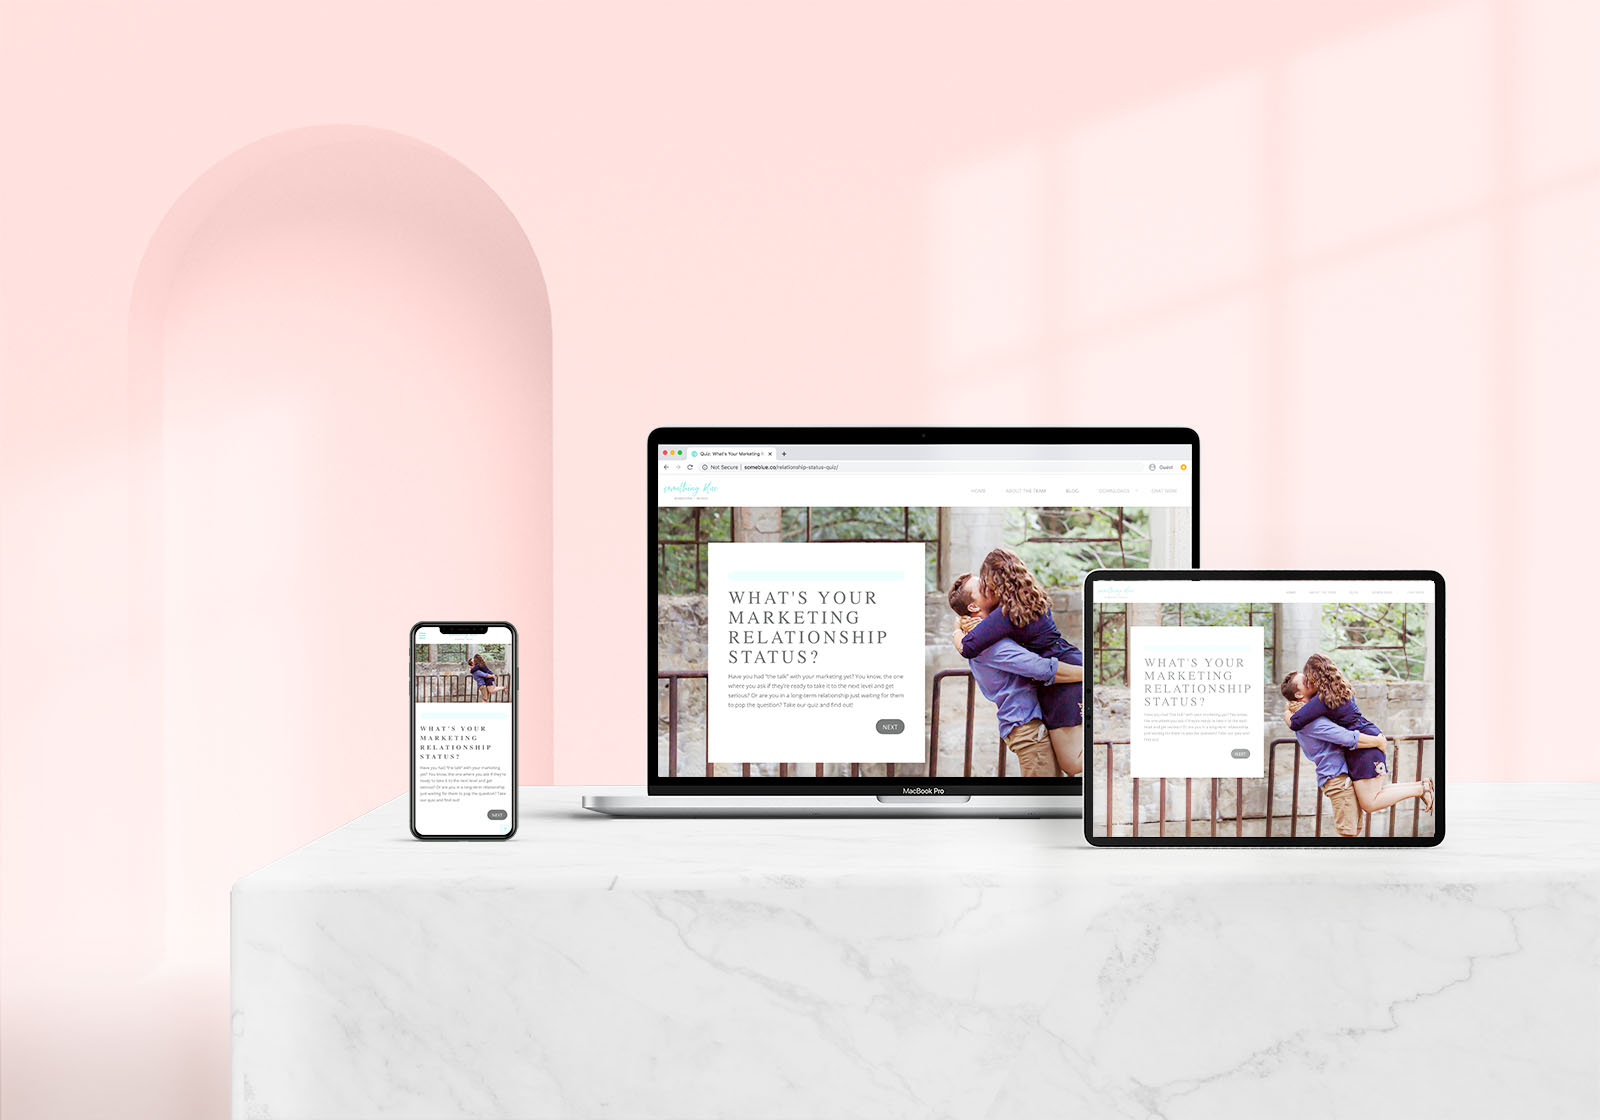
In the wedding industry? Take the quiz and discover what your marketing relationship status is!

3 Things Your Blog Post May Be Missing
There's more to writing a blog post than just typing out your content and

What’s the Best Website Platform For My Business?
When most people want to start a blog or a business, one of the